Saturday, March 24, 2007

Strawberry Galette


There's some disagreement from website to website on just what a galette is. Right or wrong, I don't know what else to call this dessert, so I'm calling it a galette.

I had some strawberries in their juices in the freezer -- about a pint or so, I'd guess. Not sweet enough, these berries, so I added about 1/2 cup of sugar and brought them to a boil, then simmered them down to about 1-1/2 c.

I used a ready-made refrigerator pie crust (because it's just that kind of day) and placed it flat on my baking stone. I spooned about 3/4 cup of the cooked strawberry mixture into the center, then folded the dough up over the filling, leaving a 4- to 5-inch circle of filling exposed in the center and letting the dough pleat naturally.

I brushed the dough with just a little bit of water, then sprinkled the entire galette with a mixture of cinnamon and sugar. Then I baked the pastry in a pre-heated 375° for about 20 minutes.

I let it cool before cutting it into wedges.

I saved the remaining 3/4 cup of strawberry filling to use later, maybe as a topping for ice cream or spooned over some cake.

Wednesday, March 21, 2007

Cookie Update


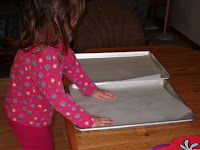
This morning Sparky and I made the cookies I wrote about yesterday. We followed the recipe to the letter, taking them out of the oven when they were just barely done (they continued to brown a little on the pans). I even opted to use use the traditional oven -- something I haven't done since we got our convection/microwave.


Patience is key while waiting for them to cool on the baking sheets, but it's worth it. These cookies are really good! They are soft and chewy inside, with just a little crunch around the edges.


The trick now will be finding out how they fare overnight. Once Spouse Guy gets home, I'm going to have a hard time making sure there are any left to try tomorrow.


By the way, we made both large and small cookies. The smaller (1/8 c.) cookies were done in 14 minutes, and the larger ones (1/4 cup scoop) took 16 minutes. All told, the batch made 24 small and 9 large cookies.

Tuesday, March 20, 2007

Two Chocolate Chip Cookie Recipes

Bluepaintred emailed me to ask if I had a recipe for soft, chewy chocolate chip cookies. Well, yes...and no.

I have a tried and true recipe that makes cookies that stay soft, but they are more cake-like than chewy. It's the final recipe of this post, and can be made with either semi-sweet or milk chocolate chips.

I also have a recipe that I've never tried before that is supposed to make chewy-gooey cookies.

My understanding is that the secret to chewy cookies is as much in the method as in the ingredient list. Apparently, using melted butter instead of room temperature butter will help make the cookies chewy, as will the addition of a second egg yolk and the use of brown sugar. Don't over-bake the cookies; remove them from the oven when they are just starting to brown around the edges and the tops have just lost their wet appearance -- don't wait for them to look brown on top. Cooling the cookies on the pan, rather than moving them off the to a cooling rack, will help them stay chewy. Finally, when you store your cookies in a cookie jar or other airtight container, try putting a slice of bread in with them. It helps keep the cookies moist.

Here's the untried recipe. I don't think I will have time to make a batch today, but maybe Blue will, and will let us know how they turn out. I'll try to get to them myself within a few days.


Big, Fat Chewy Chocolate Chip Cookies

2 cups flour
1/2 teaspoon baking soda
3/4 teaspoon salt
3/4 cup unsalted butter, melted (if using salted butter, you can omit the 3/4 t. of salt)
1 cup packed brown sugar
1/2 cup white sugar
1 tablespoon vanilla extract
1 whole egg
1 egg yolk
1-1/2 cups semi-sweet chocolate chips

Heat the oven to 325° F (165° C). Grease cookie sheets or line with parchment paper.

Mix together the flour, baking soda and salt; set aside.

In a medium bowl, cream together the melted butter, brown sugar and white sugar until well blended. Beat in the vanilla, egg, and egg yolk until light and creamy. Mix in the dry ingredients until just blended. Stir in the chocolate chips by hand using a wooden spoon. Cover dough and chill for about 45 minutes.*

Drop cookie dough 1/4 cup at a time onto the prepared cookie sheets. Cookies should be about 3 inches apart.

Bake for 15 to 17 minutes in the preheated oven, or just until the edges are lightly toasted. Cool completely on baking sheets.

Makes about 1-1/2 dozen large cookies. For smaller cookies, use smaller amount of dough and reduce baking time by a minute or two.

*If your cookies are too flat, next time try chilling longer. If they aren't flat enough, next time omit the chilling step.

Thursday, March 15, 2007

Other People's Recipes

The past few days I've been able to try some recipes that other bloggers mentioned on their blogs and/or submitted here.

1. Pixie submitted her recipe for Meatloaf Muffins a while ago and we had those earlier this week. Just like she said, they were tasty and popped right out of the muffin pans easily.


2. Granny Geek mentioned this wonderful Chocolate Tres Leches cake on her blog recently. I had to try it, and I'm glad I did. I'm not a big fan of chocolate...a little goes a long way for me...but this cake was gone within a couple of days. The link to the recipe is in Granny's post.

3. Not long ago, Violet wrote about taking a Waldorf Salad to a shower she attended. (Sorry, Vi, I can't seem to find that post on your blog.) Anyway, it had been a long time since I'd had Waldorf Salad and I thought it sounded good. But I didn't have the typical celery and raisins that usually go in it. So I made up my own version using dried cranberries, instead. As an aside, I tried using mayonnaise. It was a brand new jar, but for some reason, it didn't taste fresh, but I didn't figure this out until after I had it in the salad. No worries...I just dumped all of the salad into a large colander, rinsed off all the mayo with cold water, let it drain a little and started over. This time I used Miracle Whip from an open jar in the fridge, and it turned out much better, without having to through the whole thing in the garbage.

Here's my version:


Blogarita's Cran-Apple Waldorf Salad

3 large apples, cored and chopped (leave peel on)
1 tablespoon lemon or lime juice (to keep apples from darkening)
1/3 cup chopped walnuts
1/3 cup dried cranberries
1/2 cup mayonnaise or Miracle Whip
pinch of ground allspice
pinch of celery seed

Toss apples with lemon or lime juice. Stir in walnuts and dried cranberries.

Add mayonnaise and stir until all pieces are coated well. Add allspice and celery seed and stir well.

Chill before serving.

Makes about 4 servings.

Saturday, March 10, 2007

Mediterranean Rice and Broiled Tilapia


When Artsy Girl was about 16, she worked in a Lebanese cafe that served this rice with every dinner. She was able to get the recipe from them and I reduced the amounts to a workable family size. It's a great side dish with just about any meat.

The tilapia recipe is more of a non-recipe, but I've included the directions below.


Mediterranean Rice

1/2 stick butter
1/4 cup vermicelli or broken angel hair pasta
1 cups converted (parboiled) rice
2 cups water
1 teaspoons chicken base (or 2 chicken bouillon cubes)
1 teaspoons seasoned salt
1/2 teaspoon garlic powder

Brown vermicelli in butter. Add rice and saute until aroma is nutty. Add remaining ingredients; stir. Bring to a boil. Reduce heat and simmer, stirring occasionally, until liquid is absorbed. Let sit 5 minutes before serving.

Makes 4 to 6 servings.


Broiled Tilapia

Italian-seasoned bread crumbs or corn flake crumbs
Dried thyme leaves
Garlic powder
Salt and pepper
Olive oil or melted butter
Tilapia fillets (1 per person)

Heat broiler.

Season the bread crumbs with thyme, garlic powder, salt and pepper to taste.

Spray a baking dish or shallow pan with non-stick pan spray. Brush one side of fish fillets with olive oil or melted butter and press buttered side into seasoned crumbs. Lay un-coated side down in baking dish or pan.

Place fish under broiler and broil until fish flakes easily and crumb coating is beginning to brown.

Friday, March 9, 2007

Easy Wintertime Salsa


I call this my "Wintertime Salsa" because it's a good salsa to make when fresh tomatoes and jalapenos may not be the most flavorful because of the season. But it's good year-round. All the ingredients are canned or dried, and are things I usually have on hand anyway.

As is, I consider the salsa to be "medium" in heat. Adjust the peppers accordingly to make it as hot or mild as you like.

It goes together in less than 10 minutes, so it's a good appetizer to whip up if you have unexpected company.


Blogarita's Easy Wintertime Salsa

2 14.5-ounce cans stewed tomatoes, with juices
8 slices of pickled jalapenos (use less for a milder salsa)
2 tablespoons of the juices from the pickled jalapenos (use less or omit for milder salsa)
1 tablespoon minced garlic
1 tablespoon bottled lime juice
2 teaspoons dried cilantro leaves
1/2 teaspoon dried oregano leaves
1/2 teaspoon seasoned salt
1/2 teaspoon ground cumin

Set one can of stewed tomatoes aside.

In a blender or food processor, combine remaining ingredients and process until fairly smooth.

Add reserved can of tomatoes and process (or use pulse setting) for approximately 1 second at a time, repeating 4-5 times, until tomatoes are blended in, but still slightly chunky.

Pour into a bowl and serve at room temperature or chill, if desired.

Makes approx. 1 quart of salsa.

Tuesday, March 6, 2007

Oven Adventures

For those of you who don't read my other blog, we recently bought a combination microwave/convection oven to replace the vent hood over our gas range.

We bought it last Saturday, Spouse Guy installed in Sunday, and since then I've had very little time to play with it, but here's what I know about it so far.

The microwave is just as you'd expect. However, the popcorn sensor button really works, which is something that never quite worked well on the other microwaves I've had.

The convection oven will take a little getting used to. For one thing, the instruction manual was contradictory about whether or not you can use traditional metal pans when using the convection only feature. I've been especially careful about using microwave safe dishes, and I've been slightly dissatisfied with the way things have browned (or not) on the bottom. A phone call to Maytag this morning cleared that up; when using the convection-only setting, metal pans may be used.

Here's my first attempt at baking something. It's obviously a pizza, but I don't think it's a good test example. For one thing, I used a crust mix rather than mixing up my own (I almost never do that, but I was busy yesterday) and I accidentally bought fat-free mozzarella cheese and had it open before I realized my mistake. That stuff doesn't melt! I baked the pizza on a stone, which I often do, and used the convection setting. The bottom didn't brown well. I'm not going to make a judgment call on this, because I'd like to try again, with my own crust, cheese that will melt and a metal pan.


This morning I tried baking muffins. This was before the phone call to Maytag, so erring on the side of caution, I used my new silicone muffin pan. This first batch, filled with Peach-Mango fruit spread, went straight into the pan (no greasing or spraying necessary) and was baked on the convection setting. They took 15 minutes to bake and were nicely brown on top, but a little less so on bottom.


For the second batch, filled with strawberry preserves, I used cupcake papers simply so that I could get them ready while the first batch baked. I put the filled papers into the same silicone pan. This time I used the combination microwave/convection setting and they took just 9 minutes to get done, but as you can see, they barely browned at all, didn't rise as well, and they stuck to the papers (which I probably should have sprayed with non-stick spray).


Obviously, the first batch is more visually appealing. Both batches tasted great, but the second batch was actually just a little more moist and tender. Really, the taste/texture difference wasn't enough to be concerned about.


I think if I were making cupcakes or a cake that was going to be frosted, I would use the quicker combination-cooking setting. Otherwise, I'd use convection for the sake of appearance.


Next time I'll try baking in a metal pan, or maybe roasting or broiling meat. I'll let you know how those turn out, too.

Meanwhile, here's the muffin recipe. It came from Tawra Kellam's book "Not Just Beans", which is a really great cookbook for basic, frugal recipes.


Basic Muffins

2 cups flour
1/4 cup sugar
1 tablespoon baking powder
1/2 teaspoon salt
1 egg, beaten
1 cup milk
1/4 cup oil

Mix ingredients together; batter will be lumpy. Spoon into greased muffin cups 2/3 full. Bake at 425° for 20-25 minutes. Makes 12-15 muffins.

Jam Muffins

Fill greased muffin cups 1/4 full. Place 1 teaspoon jam on top of batter and fill with more batter until muffin cup is 2/3 full. Bake as above.

Sunday, March 4, 2007

Shrimp In Beer


This shrimp and pasta recipe has a mild-flavored sauce that keeps the flavor of the shrimp the main attraction. It goes together quickly and is great with bread sticks or garlic toast on the side.


Shrimp In Beer

2 pounds shrimp, peeled and deveined
1 bay leaf
2-3 cups flat beer|
2 tablespoons butter
2 tablespoons flour
1 cup heavy cream
1/4 to 1/2 teaspoon cayenne pepper
salt and pepper to taste
chopped parsley for garnish

Place shrimp in a large skillet and pour in enough beer to just cover them. Heat over medium-high heat until beer simmers and shrimp just turns pink. Remove shrimp from beer and set aside.

Increase heat to high and reduce beer in pan to 1 cup. Meanwhile, in another pan, melt butter over medium-high heat. Stir in flour and cook until thick and bubbly. Whisk in reduced beer until smooth. Add cream and continue cooking over medium-high heat until thickened. Remove from heat.

Stir in cayenne pepper, salt, pepper and reserved shrimp. Pour over pasta of your choice and garnish with chopped parsley.

Makes about 6 servings.

Go Ahead. Search My Kitchen.

I just added a neat little search bar to the blog at the top of my sidebar. Now you can search my recipes by ingredient or any other keyword you like. Or you can go beyond my blog to other blogs or the entire Interwebs.

Have fun!

Thursday, March 1, 2007

Bourbon Nut Pie


I had a small unopened can of mixed nuts left from Christmas, and I've been wondering how they'd be in a syrup-based pie in place of the traditional pecans. So, I found a recipe, made some changes and came up with this.

I forgot to snap a picture before I cut into it! Even with peanuts in the mix, it's delicious, but I think if I try it again, I will use the "fancy" mixed nuts without peanuts.


Blogarita's Bourbon Nut Pie

1 cup sugar
1/4 cup butter, melted
3 eggs, slightly beaten
1/2 cup light corn syrup
1/4 cup honey
1/2 teaspoon salt
1 oz. (1/8 cup) bourbon
1 teaspoon vanilla
1 can (5.5 ounces) mixed nuts (chop them if you like, I didn't)
9" pie shell

Heat oven to 375°.

Cream sugar and butter in medium bowl.

Add eggs, syrup, honey, salt, bourbon and vanilla. Mix well. Stir in nuts.

Pour filling into a pie shell; bake for 50 - 60 minutes or until knife inserted near center of pie comes out clean.

Let cool completely before cutting.

Makes one 9" pie.