Tuesday, September 25, 2007

More Recipes?

I continue to get quite a few daily hits on this website, so I can only assume that folks are searching out recipes here.

I'm not going to be posting here anymore, but I have another blog up and running, and it does include recipes and food photos among other things.

For personal reasons, I'm not providing the link here, but anyone who is interested can send an email to me here and request it. I'll send the link to you right away.

Saturday, July 28, 2007

Kitchen Is Closing Indefinitely

I'm closing Blogarita's Kitchen down indefinitely. If you want to know the reasons why, you can check out my other blog, which I'm also closing.

Thanks for stopping by here. I did almost nothing to promote this blog, yet I had several thousand hits in the seven or so months it's been up. I think that's because everyone loves food.

I toyed around with the idea of replacing this with a full-on homemaking blog, not just a cooking blog, but at this time in my life, I just don't have the time to devote to doing that kind of thing well.

Maybe some day.

Friday, July 27, 2007

Chicken Lickin' Good

Feast your eyes on this! It's Paula Deen's Southern Fried Chicken Recipe. You can find the recipe here. It's by far the best fried chicken I've had at home.

Sorry for the dearth of posts here lately. I'm busy getting ready for another garage sale, getting ready to go back to work, and working on a new project (to be announced here soon).

Monday, July 16, 2007

Restaurant Review: The Courthouse Exchange


I thought I'd try something new here by doing a restaurant review now and then.

Spouse Guy and I don't go out to eat often -- once a month or so is about it for us. When we go out, we: 1) like to try places we've not tried before, 2) prefer local eateries over the franchises, and 3) try to get a good value for our money.

I'm not saying I'll never write about a franchise restaurant, but most of the places I write about may be of interest only to my handful of local readers or any of you who might have the opportunity to visit Greater Blogaritaville (the Kansas City metro area).

**********

The Courthouse Exchange
113 W. Lexington
Independence, MO 64050

Type of food: American/Home Cooking
Atmosphere: Casual
Blogarita's Rating (1 to 5): 4.5

Some of our local radio stations sponsor "dining deals" in which you can buy a $50 gift certificate to area restaurants and/or business for half price. One of these dining deals is how we decided to try The Courthouse Exchange. That was back in May. Since we had enough money left on our gift card, we were happy to go back again this past Saturday.

Situated on the south side of the square in historic Independence, MO, the restaurant was established in 1899. Located in the basement of the structure, the decor is an interesting cross between the bar in "Cheers" and an actual courtroom, with hardwood booths and tables, renderings of the Jackson County courthouse during different eras, and photos of Independence native, President Harry S. Truman. It's said he was a regular of the restaurant during his day.

Our first trip was for lunch on a Saturday, and the dining area was busy with patrons of all ages. The restaurant features a separate bar. Like the restaurant, the bar seemed to be a non-smoking area, making it a family friendly establishment, evident by the number of young children who were there. Although the restaurant was busy, the noise level was surprisingly low.

The food at The Courthouse Exchange is home-cooking, pure and simple - no warmed-over canned green beans or instant mashed potatoes here. Portions are very generous; the tenderloins are plate-sized, and one of the kids' meals featured a 1/2-inch thick burger with fries, drink and ice-cream cookie sandwich. The onion strings, pictured above, may be the best onion appetizer I've ever tasted.

Service at the restaurant was great. We were seated quickly, our waitress was friendly and helpful, and our food arrived at the table in short order.

Prices at the Courthouse Exchange are quite reasonable, especially considering the size of the portions. Daily specials, ranging from meatloaf dinners to steak, are even better values. Our tab, which included an appetizer, two adult meals, a kid's meal and drinks for all of us, was just $35. And unlike some establishments, who will not give change for any unused portion of a gift card, they gave us the difference on a new gift card, which we used over the weekend.

This time, I tried a Reuben sandwich instead of the chicken-fried steak dinner I had before, and was just as pleased. Spouse Guy and Sparky are creatures of habit; he ordered a tenderloin sandwich both times, and she ordered the cheeseburger kids' meal both times. I heard no complaints from either of them.

Try out the Courthouse Exchange if you ever have the opportunity. Don't forget to order the onion strings!

Friday, July 13, 2007

The ABCs of Reading

Yesterday Sparky was on a field trip with her daycare to an old-fashioned country school house. While there, she wrote her name with chalk on a small slate. This is a big step for her, because she is only 4 and because she wasn't asked or encouraged to do it by her daycare teacher, Miss Amanda.

She couldn't have done this a month ago, but Miss Amanda has spent a lot of one-on-one time with her. Although already knew, mentally, the importance of reading tutors, having the results right before my eyes just reinforced what I already knew.

I hope Sparky continues to have success in learning to read, and learns to truly love reading. But there may come a time when she doesn't love reading because she's struggling with it. If that happens, I won't hesitate to consider getting her a reading tutor. Her literacy is just too important not to.

This has been a sponsored post.


Why I Gave Sparky Ice Cream For Breakfast

All through the cooler months, Sparky would wake up famished in the morning and wolf down whatever I made for her. Her favorite was a scrambled egg, two pieces of toast and some chocolate milk.

Lately, though, she hasn't wanted much for breakfast. I don't know if it's the warmer weather or if her appetite has changed, but some mornings it's a struggle to get her to eat anything at all.

This morning she asked if she could have ice cream. At first I told her no and offered her other things, all of which were refused. Then I mentally compared a small bowl of ice cream with a donut and decided it couldn't be any worse for her nutritionally. I was right. Here's how a bowl of ice cream compares to some other, more traditional, breakfast foods.

FYI, the information for the donut was just a generic Google search. The rest of the figures came straight from the product packaging or website. The ice cream we had was homemade from a mix and probably nutritionally a little different than store bought. I threw in a couple of tablespoons of dry roasted peanuts for a little protein, but those aren't counted in the information (much like the syrup isn't counted with the waffle).


1/2 cup vanilla ice cream
Calories - 120
Fat - 3 g
Carbs - 21 g
Protein - 3 g
Cholesterol - 10 mg
Sodium - 40 mg
Calcium - 10%

1 glazed donut
Calories - 180
Fat - 8 g
Carbs - 25 g
Protein - 3 g
Cholesterol - 0 mg
Sodium - 250 mg
Calcium - 0%

1 Eggo waffle (before adding syrup)
Calories - 180
Fat - 6 g
Carbs - 26 g
Protein - 5 g
Cholesterol - 15 mg
Sodium - 4 mg
Calcium - 10%

1 oz. Honey Nut Cheerios (before adding milk)
Calories - 110
Fat - 2 g
Carbs - 20 g
Protein - 4 g
Cholesterol - 0 mg
Sodium - 2000 mg
Calcium - 8%

1 Pop-Tart (frosted strawberry)
Calories - 200
Fat - 8 g
Carbs - 38 g
Protein - 2 g
Cholesterol - 0 mg
Sodium - 170 mg
Calcium - 0%


While I don't really consider any of these to be an ideal breakfast, they're foods most of us probably give our kids (or eat ourselves) from time to time. I don't think the ice cream is any worse a choice than any of the others.

I think eating anything for breakfast is better than eating nothing, so I'm not going to worry about a bowl of ice cream now and then.

Thursday, July 12, 2007

An Important Resource

As I expand the scope of this blog, I hope to add links to lots of resources that readers will find helpful in one way or another.

Part of living a simple, healthy and frugal lifestyle is living a life free of addictions and dependency. Addictions and dependency are expensive, not only in the obvious sense of the word, but also in terms of lost health, decreased productivity, relationship problems and/or counseling, medical bills and the cost of drug and alcohol rehabilitation.

I hope none of my readers or loved ones ever has to seek out drug or alcohol rehabilitation. But if they do, I hope they start their search with Rehabs.biz for a comprehensive listing of rehabilitation facilities in their area.

This has been a sponsored post.

Have Cats? Save Money

No, this isn't another sponsored post. It's just my opinion on a good product.

We have two cats. A few years ago, we switched to a pine pellet cat litter. The litter is made up of small pellets of pine sawdust. When the cats use the litter box, the pellets turn back into sawdust and absorb the fluids and the odors from both the liquid and solid waste. (The pellets themselves, to me anyway, smell less like pine and more like sunflower seed shells.) A 1/2-inch layer in the litter box would about a week, although I occasionally "scoop the poop" between changings.

It was great; the brand name was a little costly, but because we used so little at at time, it seemed worth it in comparison to regular clay litter or scoopable litter. The odor control alone was enough to make us want to stick with the pine litter.

We were lucky enough to learn that one of the major pet supply stores carried their own generic. We used that for a couple of years. The cost was much less than the brand name, running about $8 for a 20-pound bag. For us, 20 pounds would last 6 to 8 weeks.

Then one day we were in our local farm and ranch store for something and I noticed they had a product called Equine Fresh. It was the exact same pine litter packaged to use in horse stalls. The pellets were just the tiniest bit larger, but that didn't matter to our cats. The best part is the price. It runs about $6 for a 40-pound bag. It saves us more than 60% over the generic we were buying.

Now if I could only figure out a way to save money on cat food.

Wednesday, July 11, 2007

Crafty Savings

In my spare time, I like to do crafts. My favorites are knitting, crocheting and cross-stitching. It’s always fun to go to a craft store and look at all the new things. But the next best thing is shopping online AND saving money on craft supplies using Joanne.com. coupon codes.

Joanne.com and many other online shopping coupons are easy to find at www.couponchief.com.

After all, who doesn’t like saving money?


This has been a sponsored post.

Spinach Salad With Oranges and Beets


Here's a nice salad to go with just about any kind of meat. We had it with KC Strip steaks. The beets discolored the cucumber slices a little, but it still tasted great. We added a few last minute toppings as well: sunflower seeds kernels, shredded cheese and for Spouse Guy, some bacon bits.


Spinach Salad With Oranges and Beets

Fresh spinach, about 5 ounces, rinsed and stems removed
1 7-ounce can mandarin orange segments, drained
1/2 of 15-ounce can of sliced beets (save rest for another meal), cut into julienne strips
1 small cucumber, cut into slices, then cut into quarters
2 green onions, thinly sliced
prepared Italian dressing

Toss all to combine. Serve immediately or refrigerate until ready to serve.

Makes 4 - 6 servings.

Tuesday, July 10, 2007

Going Back To Work

For those of you who don't read my other blog, I've been hired by a food service company that has a contracted with a local university. They've hired me to be their baker and on-campus caterer, but I'm sure I'll be helping with everything else, too.

The position allows for more flexibility and creativity than one might think, and I've already been encouraged to bring in some of my favorite recipes that might be adapted to serve 300 or so students and faculty.

The kitchen is being revamped now, and I start on August 9. Maybe even a few days sooner. In the meantime, I'll be trying to get some things done around here to make my transition back to work more easy. In particular, I'm going to be "cooking ahead" and freezing some meals that will be quick to heat and eat later. I'll share those with you as I make them.

I hope to keep up on my regular posts, too.

Vacation Savings

Our family recently took a trip to Omaha, and it took me quite a while to find Hotel Discounts for our stay. We were looking for a hotel that was both affordable and had the amenities we desired. Cheap hotels that are also clean and comfortable are often hard to come by. The hotel where we stayed was more than adequate, but in order to get the best deal possible, I had to book it “sight unseen”, meaning I didn’t know for sure which hotel chain we’d be getting. As it turned out, it did have the swimming pool we’d wanted, but it was an outdoor pool and the weather was too cool to use it. An indoor pool would’ve been more desirable, but all I was able to find out, in order to get that deal, was that it had a pool of some kind.

I had searched through several of the online travel/hotel locators, but if I’d been aware of Hotelreservations.com, my job would have been so much easier. Their website is a cinch to use, and allows searches based on city, address, or available amenities, like that indoor pool. The search results can then be sorted by best value, price, quality or alphabetically by name. Once a hotel has been selected, reservations can be made online or over the phone.

In addition to hotel reservations, Hotelreservations.com allows users to find and book flights, vehicle rentals, vacation rentals and vacation packages. Because of the nature of Spouse Guy’s work, we don’t have any plans for a longer, farther-away vacation any time soon, but I’m sure the vacation rental feature will come in handy in a few months when we plan a 2-3 day getaway for our 8th anniversary. I’ve done a couple of quick searches already and have come up with some interesting possibilities. And I feel confident I can find the best rates using Hotelreservations.com.

If you’re planning a trip, check them out:


This has been a sponsored post.

Back-To-School Sales

No one in our home is a student, but we still take advantage of back-to-school sales; they're already beginning in our neck of the woods.

It's a great time to stock up. There are usually discounts on computer equipment, great deals on underwear and socks, and huge savings on office supplies.

This isn't a sponsored post, but many Fruit of the Loom items (socks, t-shirts, underwear) for all ages are on sale right now. Fruit of Loom is offering a $10 store card at K-Mart when you purchase five packages of any of their items. Combined with the sale prices, this can end up being a very good bargain. We were able to get Spouse Guy some much needed colored pocket t-shirts for work at 50¢ each, after the rebate. Unfortunately, the rebate is limited to one per household.

Take a look at those store ads, whether or not you have kids in school. You're likely to find a good deal or two on some things you really need. And if your state has a tax-free school shopping day or weekend,* take advantage of that, too. It's especially helpful when buying big-ticket items such as computers.


*Information on this link may or may not be current.

Saturday, July 7, 2007

Changes Are On The Way

Changes are on the way at Blogarita's Kitchen, and among them will be occasional sponsored ads. While some readers may be against ads on blogs, I've decided they're fitting on a blog that will soon be not just about recipes, but about living a frugal lifestyle. Feel free to read them or skip over them as you prefer.

A penny saved may be a penny earned, but a penny earned can easily be a penny saved. Ads on blogs are just one more way to make (and save) a little extra cash.

So many of my blogging friends have chosen Pay Per Post as a way to boost their income that I decided to give Pay Per Post a try, too. Why not make a little money doing something I love?

If you’ve been thinking about ways to make money while you blog, give Pay Per Post a try. You’ve got nothing to lose.


Wednesday, July 4, 2007

Sparky's Birthday Cake

Today is Sparky's birthday! The theme of her party was SpongeBob SquarePants, and I made a cake to go along with the theme. I'm not very good at drawing, so instead of making a cake that was just SpongeBob, I decided to go with an underwater theme a la the TV show. I guess "the Bob" is no longer THE rage in the stores, and I had trouble finding a figuring or toy I could use as a cake topper. Instead I found a deck of playing cards and used one of those.

For anyone who's interested, here's the play-by-play. It's not the best decorating job I've done, but it may have been the most fun.

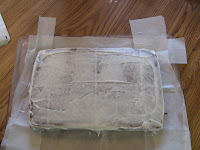
Here's the cake with just a light coating of frosting to seal in crumbs and moisture.


Again, I took the easy way out and used a couple of cans of canned frosting. I had to add additional powdered sugar to make it stiff enough to work with, though. I colored a good portion of frosting a medium-light blue, and an equal portion a medium-light green. Then I piped a stripe of each color around the sides of the cake and several stripes of each on the top of the cake, with more blue toward the bottom and more green toward the top. I blended it as I spread and smoothed the frosting.

Next I added the "things". I'm not sure if they are supposed to be starfish or amoeba or just what, but they are in the background of almost every frame of the SpongeBob show.


Using the same blue and green frosting and adding just a little more coloring to each, I piped green shells around the base of the cake and blue ones along the top edge.


The last frosting decorations I added were the aquatic plants. I just winged it and they came out looking alright.


Finally, right before serving, I added the SpongeBob card and 4 candles.


I had fun making it and the kids loved it!

Sunday, July 1, 2007

Greek-Style Chicken Pitas


If you like gyro sandwiches, here's a great recipe you can make at home. It's reminiscent of restaurant gyros, but without the expense (or the sometimes too-strong flavor) of lamb.

The original recipe called for pocket pitas, but I prefer the softer pitas without pockets. I made them from scratch using the same recipe I use for Garlic Bread Sticks. Instead of forming them into bread sticks and baking them, I divided the dough into 16 portions, patted each out into a circle about 10 inches in diameter, and cooked them in a medium-hot skillet for about a minute and a half on each side. The leftovers can be used for other sandwiches, or frozen for a later meal.


Greek-Style Chicken Pitas

2 tablespoons milk
1/3 cup finely crushed saltine crackers
1 small onion, finely chopped
1/3 cup dry instant milk (optional -- I added it to increase calcium)
2 cloves garlic, minced
1 teaspoon dry oregano leaves, crushed
1 teaspoon ground cumin
1 teaspoon ground coriander
1 teaspoon garlic salt
1/4 teaspoon ground black pepper
1 pound ground chicken or ground turkey

*****

1 6-ounce carton of PLAIN yogurt (make sure it is not sweetened and not vanilla flavored)
1/2 medium cucumber, peeled, seeded and chopped
1 green onion, thinly sliced
1/8 teaspoon sugar

*****

Fresh lettuce or spinach leaves.
Pita breads


Combine milk, cracker crumbs, onion, dry milk, garlic, oregano, cumin, coriander, salt and pepper.

Add ground chicken and mix well. Shape into 6 oval patties.

Place patties on unheated broiler rack. Turn oven on to broil. Broil for approximately 7 minutes, then turn over and broil an additional 5 - 7 minutes, or until chicken is no longer pink inside.

Meanwhile, combine yogurt, cucumber, green onion and sugar. Chill until ready to use.

To serve, slice each chicken patty in half lengthwise. Arrange in center of pita bread. Top with lettuce and cucumber sauce. Roll or fold to eat.

Makes 6 pita sandwiches.

Thursday, June 28, 2007

Kitchen To Re-Open Soon...

...and with updated features.

Food is foremost in Blogarita's Kitchen, but I'm hoping to also include some new features, including:

* Local restaurant reviews
* Product reviews (both sponsored and non-sponsored)
* Money-saving ideas for the kitchen and all around the house
* Helpful homemaking tips
* Menu ideas
* Home improvement (watch us...slowly...get our home in shape)

While there's no shortage of homemaking and food-related blogs and websites, we all do things differently and there's always something new to be learned. I hope, with that in mind, you'll visit often, and will also check out the sites on my blogroll for other great ideas. I plan to update those soon, too!

Friday, June 22, 2007

The Kitchen Is Temporarily Closed

Due to the demise of my digital camera, I won't be posting on Blogarita's Kitchen for a while.

But keep it in your favorites. I'll be back soon with more recipes and food pics!

Monday, June 11, 2007

Garlic Bread Sticks


I pulled a pan of lasagna out of the freezer that I'd made a while back, and decided some soft bread sticks would be just the thing with it. These aren't a copycat of Olive Garden's bread sticks, but they are clearly similar. They're full of soft, garlicky, buttery goodness.

They're easy to make, too.


Garlic Bread Sticks

2 cups very warm water (110° - 115° F.)
2 tablespoons sugar
2 tablespoons active dry yeast (or two of the small packages of yeast)
1 teaspoon salt
2 tablespoons extra virgin olive oil
5 cups of flour
_____

1/2 stick butter
2 tablespoons extra virgin olive oil
1 teaspoon granulated garlic

Combine the warm water, sugar and yeast in a large mixer bowl. Stir well and let stand for 10 minutes.

Using the bread hook attachment, mix in salt, then olive oil. Add flour all at once and mix to moisten, then knead until a smooth, elastic dough forms. Kneading time will vary depending on the type of mixer you use or if you decide to knead the dough by hand.

Remove dough from mixer bowl and place in lightly oiled bowl, being sure to coat all surfaces with oil. Cover with a towel and let rise until doubled, about 45 minutes.

Meanwhile, heat oven to 325°F.

Punch dough down and knead about 10 times on a lightly oiled surface. Divide dough in half, placing one half back in oiled bowl. Cut the other half into 16 equal portions. Roll each portion into a bread stick approximately 8 inches long. Place bread sticks on cookie sheet that has been lined with parchment paper or lightly greased. Cover with a towel and let rise until doubled, about 30 minutes.

Repeat with remaining dough.

While dough rises, place 1/2 stick of butter and 2 tablespoons of olive oil in microwave safe dish. Heat in microwave just until butter is melted. Remove from microwave and stir in garlic granules. Set aside.

Bake each tray of bread sticks for approximately 20 minutes or until lightly browned. Remove bread sticks from oven and immediately brush with garlic butter mixture. Let bread sticks cool on pan for 5 - 10 minutes before serving.

Makes 32 bread sticks.

Monday, June 4, 2007

Beef Tips and Noodles


Quite unintentionally, we found ourselves in a rut the past few days with Italian food. Last Thursday and Friday we had homemade pizza (admittedly not the best I'd ever made, either). On Saturday, we enjoyed a delicious Italian buffet meal with our friends Nobody and Fantastagirl, and last night after being on the road for a couple of days, all I could muster was a couple of Jack's frozen pizzas.

I was in the mood for something different tonight, and Beef Tips and Noodles was just the ticket. In my opinion, it's nothing but comfort food that can be dressed up for company. I like it best with hot dinner rolls and a cool salad.

The following is a recipe I "stole" when I worked for a catering company, and reduced to a family-sized amount. You can use any cut of beef, even a tougher one. The meat simmers for such a long time, it will be tender. I've made it several times with venison, and I think I like it even better than beef, but we haven't had any venison for a long time, so beef it is. This time I'm using top round steak.

I like to use an oven-proof skillet and lid, but if you don't have one, you can use a large casserole dish and cover it with foil.


Beef Tips and Noodles

Roux (for thickening gravy):

1 stick butter
1/2 cup flour

Combine and cook over medium heat until mixture is bubbly and gives off a nutty aroma, about 3-5 minutes. Note that the darker the roux is allowed to cook, the "darker" your gravy will taste.

Set roux aside. (If all if it is not used in this recipe, you can refrigerate it for use at a later date.)


Beef Tips

1 lbs. beef, cut into 3/4-inch cubes
olive oil
1 teaspoon seasoned salt
1 teaspoon garlic powder
1 teaspoon dried thyme leaves
1/2 teaspoon black pepper
1 onion, cut into chunks
mushrooms, cut into chunks (optional, as many or few as you like)
1-1/2 cups water
1 10-ounce cans beef consomme (can use beef broth, but consomme has richer flavor)
browning sauce, such as Kitchen Bouquet

Heat oven to 400° F.

Spray bottom and sides of oven-proof skillet or casserole dish with non-stick spray. Combine garlic powder, seasoned salt, dried thyme leaves and pepper. Sprinkle half of this mixture over bottom of pan. Place meat cubes in pan and sprinkle remaining spice mixture over the top. Bake in oven, uncovered, for 20 minutes, stirring once if desired.

Remove pan from oven. Reduce heat to 250°. Pour water and beef consomme carefully around beef cubes. Add onion and mushrooms. Cover pan, return it to oven, and let simmer gently for at least 2 hours or until meat is very tender.

Remove pan from oven and sit on top of stove. While liquids are still very hot, carefully whisk roux into liquids 1 tablespoon at a time, until desired thickness is achieved. Gravy will be light to medium brown. Stir in browning sauce, a little at a time, until desired color is achieved.

Taste gravy and adjust seasonings to taste.

Cover and set aside until ready to serve.


Noodles:

1 8-ounce package of dry egg noodles
olive oil
fresh or dried parsley

Cook noodles according to package directions. Drain.

Drizzle lightly with olive oil (I prefer extra light olive oil for this), and toss to coat; this keeps noodles from sticking together.

Sprinkle with parsley flakes and toss.

Portion noodles onto serving plates or wide shallow bowls. Top with beef tips and gravy. Serve immediately.

Makes 4 servings.


Dress-Ups:

Add 1/4 cup or so of dry red wine with the water and beef consomme for a richer flavor.

Stir 1/4 cup or so of sour cream just before serving for more of a stroganoff flavor.

Wednesday, May 23, 2007

Fried Zucchini

I love fried zucchini. I usually just dip the slices of zucchini in beaten egg and then flour, then pan fry them, but this time I decided to use a crumb coating and deep fry them. I like the flavor both ways, but I think deep frying makes a better looking dish.

When I made Fantastagirl's Chicken Parmesan, I had crumb coating leftover, which I stored in a zipper bag in the freezer. I added a little seasoned salt (1 t. seasoned salt to 1/2 cup breading) and used it to bread the zucchini.


Fried Zucchini

2 cups cracker crumbs
2/4 cup Parmesan cheese
1 teaspoon salt
1 teaspoon paprika
Seasoned salt to taste
2 medium zucchini, sliced into 1/8" to 1/4" thick slices
2 large eggs, beaten
Peanut oil for frying

Heat oil in deep fryer to 345°.

Combine cracker crumbs, Parmesan, salt and paprika. Add seasoned salt to taste.

Dip zucchini slices in beaten egg, then coat with seasoned crumbs. Fry in hot oil, in batches of about 5 - 8 slices, until golden brown, turning once.

Drain on paper towels, then serve.

Makes 4 - 6 servings.

Friday, May 18, 2007

Roast Sticky Chicken


Versions of this recipe have been all over the Internet for years, so I just picked one and ran with it. I ended up with moist, rotisserie-style chicken and a cup or two of flavorful, if a little spicy, gravy to go with it.

You have to plan ahead for this recipe because the seasoned chicken has to sit over night in the fridge. I tried skipping this step once before, and all I have to say is "Don't!". It makes a huge difference in the flavor and moistness.


Roast Sticky Chicken

4 teaspoons salt
2 teaspoons paprika
1 teaspoon onion powder
1 teaspoon dried thyme
1-1/2 teaspoons black pepper
1/2 teaspoon cayenne pepper
1 teaspoon garlic powder
2 onions, quartered
2 (4 pound) whole chickens

In a small bowl, mix together salt, paprika, onion powder, thyme, pepper, cayenne pepper and garlic powder.

Remove and discard giblets from chickens. Rinse chicken cavities, and pat chickens dry with paper towels. Rub each chicken inside and out with spice mixture (I only did the outside). Place 1 onion into the cavity of each chicken. Place chickens in a resealable bag or double wrap with plastic wrap. (I put them in the pan I wanted to roast them in and wrapped the entire thing in plastic wrap.)

Refrigerate overnight.

Preheat oven to 250° F.

Place chickens in roasting pan. Bake uncovered for 5 hours, to a minimum internal temperature of 180° F. Let the chickens stand for 10 minutes before carving.

Notes: After about 1 hour of cooking, I poured about a cup of water in the pan, stirred it into the pan juices, and then basted the chickens with the liquids every 45 minutes or so.

To make gravy, remove the cooked chickens from the pan, pour the pan drippings into a small sauce pan, and add about a cup of water to dilute the spiciness of the drippings. Heat to a boil, and then thicken with a mixture of cornstarch and cold water (about 2 T. of cornstarch in 1/2 cup of cold water).

Makes 2 whole chickens and about 2 cups of gravy.

Monday, May 14, 2007

Shrimp On The Barbie


I decided to make some shrimp kabobs on the grill yesterday (yeah, it was Mother's Day, and I still cooked...but I wanted to, so it's all good).

I didn't use a recipe, but just put together kabobs from whatever I could find in the fridge. The veggies are green pepper, chunks of yellow squash, onion and chunks of pineapple. I brushed both the shrimp and the veggies with this Ginger Dressing. I love it on salad, but to be honest, I couldn't taste it on the kabobs once the food was done. Next time I'll probably use some kind of an Italian dressing.

Because shrimp cooks so quickly, I skewered the vegetables separately and put them on the grill about 10 minutes ahead. I served the kabobs over orzo pasta (could use rice) with a side of steamed broccoli.

I was a little hesitant to post this, because on first taste, I thought it was a little bland and could have used a sauce of some kind. But with a sprinkle of salt and garlic powder, it perked right up, and the more I ate, the more I started wishing I'd made more!

Thursday, May 10, 2007

Sports Drink

Spouse Guy works out in the heat every day and goes through a lot of sports drinks such as Gatorade and Powerade. Those drinks get to be very expensive, especially if you buy them by the 32-ounce bottle. The powdered form is a little less expensive, but only comes in two or three flavors.

Instead of buying sports drink, I've been making it home for the last couple of years. Spouse Guy saves a couple of the bottles from the store-bought kind and refills them to take in his lunchbox (aka, a 12-pack sized cooler). The number of flavors is limited only by the combinations of Kool-Aid you can come up with.

The salt and potassium chloride is what makes this a sports drink and not just Kool-Aid. The orange juice is optional, but don't add it to grape or any other purplish drink mix. The memory of me making punch as a young teenager tells me that mixing orange and purple results in a tasty, but hideously ugly, army green drink.


Homemade Sports Drink

1 pkg. non-sweetened drink mix such as Kool-Aid
2/3 cup sugar
3/8 teaspoon salt
1/8 teaspoon salt substitute (potassium chloride)
1/2 cup orange juice (optional)

Combine all, then add cold water to make 2 quarts.

Double the batch using two different flavors of drink mix to create a new flavor.

Tuesday, May 8, 2007

Chicken with Pepperoni Cream Sauce


That's one bright photo! Not sure what happened, but this isn't quite so orange-y in reality.

I found this recipe some time ago, then lost it, then found it again. It came from Hormel or Armour or some other maker of pepperoni. I made it with my homemade pasta sauce instead of canned chopped tomatoes, and omitted the oregano.

Serve it over pasta or rice, or do like I did and serve it over orzo pasta that's shaped like rice.


Chicken in Pepperoni Cream Sauce

4 large boneless skinless chicken breast halves, cut in half cross-wise
2 tablespoons olive oil
1 small package of sliced pepperoni
1 small onion, thinly sliced
1 can (15 ounces) can chopped tomatoes
1 teaspoon dry oregano leaves
1/2 cup half and half

Brown chicken breast pieces on both sides in olive oil in a large skillet. Remove chicken and set aside.

In same pan, saute pepperoni and onion until onion is tender, about five minutes. Add tomatoes (or pasta sauce) and oregano. Stir well. Place chicken back in pan; cover and heat over medium-low heat until juices run clear when chicken is pierced with a fork.

Stir in half and half; heat through and serve.

Makes 4-6 servings.

Friday, May 4, 2007

Product: Spray-On Salad Dressing


Anyone else tried this yet? It's Wishbone Salad Spritzers. A few sprays on your favorite salad and you're good to go.

We generally go for the creamy salad dressings, but I found these on a great sale and decided to try one. We bought the Balsamic Breeze flavor, and liked it well enough that I went back and got the Italian flavor.

The label says it has just one calorie per spray and that the smallish 7-ounce bottle will dress as much salad as a 16-ounce bottle of regular dressing. That's at 10 sprays per serving, which is what Spouse Guy uses. I prefer a lot less dressing than he does, and the pump is a great way to keep from over-dressing my salad.

You can read more product information here.

Wednesday, May 2, 2007

Copycat Pan Pizza


Although I've posted a picture of this pizza here before, I don't think I've posted the recipe. I'm not sure where I found the recipe, but it's been a favorite since I did. It's not an exact replica of the well-known pan pizza, but it's close. It's by no means a low-cal or low-fat dish, but you can use the same crust recipe and bake it just as you would any other pizza with great results and fewer calories.

A word about my equipment. My pans are actual pans from the Pizza Hut chain. I bought them on eBay about 3 years ago and they're wonderful. Because they were actually used in the restaurant, they came to me well-seasoned and virtually non-stick. Most times I simply wipe them out with a paper towel after I use them (much like a cast-iron skillet) or, if absolutely necessary, I wash them with hot water, but no soap, then oil them lightly with olive oil to keep the surface non-stick. If you make a lot of pizza at home, it's well worth it to try to find these pans. They're also great for baking a pan of dinner rolls or cinnamon rolls.

The cutter I use looks something like this. It works so much better than the typical wheel type cutter. I highly recommend one of these, too, if you make a lot of pizza. They are also great for cutting quesadillas, some kinds of cakes and pies, homemade dough into noodles, etc.

I used to use a KitchenAid mixer for bread doughs, which worked great until the heavy doughs eventually stripped the gears. Now I use a Bosch Universal. It costs about the same as the top-end Kitchen Aids, but is belt-driven from underneath the mixing bowl (instead of gear driven from the top). It also has an integrated blender that actually works the way a blender should. If you don't have either a KitchenAid or a Bosch, you can still make this crust by hand-kneading. (Some people find it therapeutic.)


Copycat Pan Pizza Crust

Crust:

2 cups warm water (110° to 115° F.)
1 pkg. dry yeast (or 1 tablespoon bulk yeast)
2 tablespoons sugar
1/3 cup olive oil
1 teaspoon salt
4 to 8 cups of all-purpose white flour (can use 1/2 white, 1/2 whole wheat)
1/2 cup olive oil, divided

Place warm water, yeast and sugar in mixer bowl. Stir. Let proof for 10 minutes.

Add oil and salt. Mix. Add 4 cups of flour. Mix well.

With mixer running, gradually add additional flour until dough forms a ball and pulls away cleanly from sides of bowl. Continue mixing (or knead by hand) until a soft, well-developed dough forms (if you use all white flour, the dough should feel like very soft with a silky texture).

Prepare pans by pouring 1/4 cup olive oil in each of the deep dish pizza pans. Rotate pan until bottom and side surfaces are coated, then set aside. Oil will pool in bottom of pan.

Divide dough into two equal portions. Roll or pat out on a lightly oil (not floured) surface until they are slightly larger than the size of your pans. Carefully lift dough and place in each pan. If dough doesn't quite reach the edges or if the oil comes over the top a bit, that's normal.

Cover each pan and let sit for an hour for dough to rise.

Heat oven to 400° F.

Remove covers from pans and top with your favorite sauce and toppings (pictured are pizzas with homemade sauce, pepperoni and mozzarella).

Bake at 400° for approximately 15 minutes, or until cheese is melted and cheese and crust are nicely browned. Transfer pizza to cutting board or pizza stone to cut, then transfer back to pan if you wish for serving.

Makes 2 medium (12-inch) pan pizzas.

Wednesday, April 25, 2007

Shredded Savory Pork Soft Tacos


This recipe is from the "Better Homes and Gardens Special Interest: Mexican" recipe magazine.

I reduced the amount of chopped jalapeno pepper to just one (from three). This yielded nice, mildly spiced pork that's ideal for kids or anyone who doesn't like a lot of heat. If you do like heat, spice it up with your favorite hot salsa. The same recipe could probably be used with boneless chicken breasts instead of pork.

I snapped the photo before folding the whole wheat tortilla, so you could see the filling. The one in the picture is topped with a few cooked black beans, some cheese, sour cream and homemade salsa. I also added some shredded lettuce to mine before folding.


Shredded Savory Pork

1 2-pound boneless pork loin blade roast
2 large onions, quartered
3 fresh jalapeno peppers, cut up
8 cloves garlic, minced
2 teaspoons ground coriander
2 teaspoons ground cumin
2 teaspoons dried oregano, crushed
1/2 teaspoon salt
1/2 teaspoon ground black pepper

Trim fat from meat. Place roast in a large saucepan or Dutch oven;' add enough water to nearly cover. Stir in onions, jalapeno peppers, garlic, coriander, cumin, oregano, 1/2 teaspoon salt and 1/2 teaspoon ground black pepper. Bring to boil; reduce heat. Summer, covered, for 2-1/2 to 3 hours or until very tender.

Remove meat from liquid; discard cooking liquid. When cool enough to handle, shred the meat. Use as a filling for tamales or tacos. Makes about 8 servings (about 3 cups cooked meat).

Slow-Cooker Directions: Trim fat from meat. If necessary, cut meat to fit in a 3-1/2 quart or 4-quart slow cooker. Add 1 cup water and the remaining ingredients. Cover and cook on low setting for 8-10 hours or high setting for 4-5 hours. Continue as directed.

Make-Ahead Directions: Place shredded meat in a freezer container. Cover and freeze for up to 3 months. Thaw overnight in the refrigerator before using.

Friday, April 20, 2007

Stuffed Peppers


These peppers received high praise when I cooked them for our traditional Tuesday night American Idol gathering. I'm posting just the general recipe, but for mine, I used ground turkey, brown rice, and fat-free cheese, which makes them a very healthy choice for a meal.

These also are great for leftovers. I brought them to work for lunch both Wednesday and Thursday and they tasted almost as good as they did when I first took them out of the oven. My friend, Paula, suggested freezing them for a quick meal later on.

Stuffed Green Peppers


Six Green or Red Peppers
2 cups cooked rice
1.5 pounds of ground beef
1/2 cup chopped onion
15 oz. can of tomato sauce
2 teaspoons minced garlic
1 teaspoon salt
3/4 cup of fat-free shredded mozzarella cheese
1 teaspoon crushed basil leaves
1 teaspoon dried oregano


Cut peppers in half, lengthwise, and remove seeds and membrane. Bring enough water to cover peppers to a boil in a stockpot and immerse peppers in boiling water for 5 minutes. (This helps to pre-cook the peppers so they are soft, instead of crunchy, when they come out of the oven.)

Cook meat and onions in large pan. When almost thoroughly cooked, add tomato sauce, salt, and garlic to meat. Cook, stirring frequently.

Put peppers in a glass, non-greased casserole dish. Spoon meat mixture into each pepper. Cook in 375-degree oven for 30 to 35 minutes. Sprinkle cheese over the top of peppers and return to oven for another 10 minutes of cooking.

Saturday, April 14, 2007

Fantastic, Incredible Chicken Parmesan


A while back, Fantastagirl posted a recipe for Chicken Parmesan. She said the recipe came from Mr. Incredible's mom. (I hope she doesn't mind that I'm writing about it here; I wasn't able to get in touch with her yesterday to ask permission.)

Under the category of "back story with too much information", a long, long time ago, I tried a frozen version of Chicken Parmesan. Either I was already getting sick, or I got sick from it. Either way, it was many years before I could even think about the combination of breaded chicken and pasta sauce together. Even now, I tend to avoid this kind of dish whenever we go out for Italian food, in favor of creamy white sauces.

But I have to admit, I loved this dish! I tried to stay true to the recipe, but in the end had to make two changes. I used cornflake crumbs instead of cracker crumbs, because that's what I had on hand. And I cut the amount of Parmesan cheese from 3/4 cup to 1/3 cup, because of Spouse Guy's dislike for "stinky cheese". Otherwise, I made it just as she posted it.

We served it over pasta, with a salad and some garlic toast to go with it. This is definitely one for the "keeper" file.

Thursday, April 12, 2007

Quiche Lorraine


This was a great addition to our Easter brunch this past weekend. Dave refuses to eat quiche - he says that it isn't very manly. However, by simply changing the name to "egg pie," he decided he was willing to eat it, and verified that it was delicious!

I actually made these the day before, kept them in the fridge overnight, and then rewarmed them for about 15 minutes in the oven the next day. These also freeze really well!

Quiche Lorraine

1 (9-inch) deep dish pie crust
6 slices of bacon
1/4 cup green onions
1 tablespoon of cooking oil
4 eggs
1 cup half-and-half
1 cup shredded Swiss cheese
1/2 teaspoon of salt
1/2 teaspoon of dry mustard
1/8 teaspoon of nutmeg

Cook the bacon until it is crispy. Cut or crumble into small pieces. Set aside.

Lightly saute the green onions in the cooking oil. Set aside.

Beat the eggs. Mix with half-and-half, salt, dry mustard, and nutmeg.

Layer cheese, onions, and bacon in the pie crust. Pour egg mixture over the top.

Cook in a 350-degree oven for 40-45 minutes, or until top is lightly browned. You should be able to insert a knife near the center and remove it still clean when it is fully cooked.

Note: I also made another "healthier-version" of the quiche. I omitted the bacon, added some other veggies that I sauteed with only Pam Spray, substituted the eggs with Egg Beaters, and used fat-free cheddar and mozzarella cheeses. I also used some basil instead of the dry mustard and nutmeg. It was a hit!

Monday, April 9, 2007

Sweet & White Scalloped Potatoes


I almost forgot to grab a picture of these before they were gone! These scalloped potatoes are a wonderful side dish for an Easter ham, but I think they'd be great with just about any meat.

There are two things that make this dish unique compared to other scalloped potatoes. The first is that they include sliced sweet potatoes. The second is that they are made on top of the stove, freeing up your oven for other things, like that ham or a pan of rolls.

Giving credit where it is due, this recipe is from the Carnation Milk Company. I clipped it from a local grocery ad.


Sweet & White Scalloped Potatoes

1 can (12 oz.) Carnation Evaporated Milk
2 chicken bouillon cubes
1 teaspoon onion powder
1/2 teaspoon dried thyme leaves
4 cups peeled and sliced white potatoes
2 cups peeled and sliced sweet potatoes
1/2 cup Parmesan cheese

Heat evaporated milk, bouillon cubes, onion powder and thyme in a large skillet over medium high heat, stirring occasionally, until mixture comes to a boil and bouillon is dissolved. Add potatoes.

Cook, stirring occasionally, until mixture comes to a boil. Cover ; reduce heat to low. Cook, rearranging potatoes gently and occasionally, for 35 to 40 minutes or until potatoes are tender. Sprinkle with cheese; serve immediately.

Sunday, April 8, 2007

We've Been Nominated!!

DutchBitch over at The Dutch Files has nominated us for "Best Food Blog" at the Blogger's Choice Awards!

Please click over and cast your vote for us! I can't vote myself because I had already voted for someone else before I learned of the nomination.

You can vote here. You have to register, if you haven't already, but registration is quick and easy.

Thanks for your votes, and thanks, Dutchy, for the nomination!

Friday, April 6, 2007

Decorated Cake For Easter


Cake decorating can be a lot of fun if you're in the right mood. I guess you could say that I'm "self-taught" when it comes to decorating. When I worked for a catering company a few years ago, I started out by piping small flowers onto brownies after watching a co-worker do it. The more I watched, the more I picked up, and once I finally got around to taking a cake decorating class at one of the hobby stores, I already knew how to do everything in the beginners' class.

I thought about going on to higher cake-decorating education, but I didn't have any plans to make a career out of making party or wedding cakes, and we don't eat enough cakes at home, so I decided that what I can do now is enough.

This was my first single-layer decorated cake. I have to say it's much easier than the multi-layer cakes, simply because I could tilt the plate to get the sugar on the sides. Had I done that with a double-layer cake, the entire thing would have landed on the countertop.

I "cheated" this time around and used 1-1/2 cans of prepared frosting in a tub. This is NOT the ideal frosting for decorating. It's far too soft and drastically limits what can be done with it (no roses, for example). But for the design I made and the limited time I had, it worked just fine. The cake will have to be refrigerated until serving time, though, because the frosting is so soft.

There's no recipe, but I did take step-by-step pictures:

1. Start by baking a cake in an 8-inch or 9-inch round pan. I used 9-inch, but wish I'd used the smaller so it would have been a taller layer.

2. If you use parchment paper, don't forget to peel it off the bottom. Let cake cool on a wire rack.

3. Place cake on serving plate, with strips of parchment under edges to keep frosting off plate.

4. Cover with a very thin layer of frosting, to seal in moisture and to also seal down any crumbs. Chill for at least two hours.

5. Cover with a moderately thick layer of frosting.

6. You can smooth out the top by dipping the offset spatula in room temperature water and running it lightly over the frosting.

7. Sprinkle colored sugar on sides.

8. Color a small portion of frosting a deep shade of lavender. I use Wilton gel coloring. Pipe concentric circles of this frosting onto cake using a small round decorator tip.

9. Using a wooden skewer draw through the frosting from center to edge to create spider-web effect. Or draw from the edge to the center to create a similar, yet different, effect.

10. Add remaining white frosting to whatever is left of the deep lavender frosting. Stir very well to achieve a paler lavender color. Pipe large rosettes onto top of cake using an extra large star tip.

11. Carefully remove parchment strips from under cake and using a small star tip, pipe a chain of shells around edge where cake and plate meet. You're done!

Citrus Shrimp with Penne Pasta

Hey, all! This is Violet! I'm feeling rather honored that Blogarita asked me to come over and post some of the recipes that I try at home... I have only recently begun cooking foods other than Easy Mac and toast, because I've spent so many years working so much that I haven't had time to cook. But, with Dave around to sample all my experiments, I've become rather adventurous and like to try things out of the ordinary.

This is a recipe that I found in my Better Homes and Gardens cookbook. When I decided to make it at first, I thought it would be just for Dave and me. Then it was us plus two friends. By the time I was cooking, we were having a dinner party for eight people... Luckily, I had enough food to double the recipe.

I was a little bit nervous that the citrus flavor of the dish wouldn't go over too well and that we would end up ordering pizza instead, but in fact, the flavor gave just enough kick to it to make it unique, but not overpowering. The orange slices also really brought out the flavor and the shrimp really complemented the whole dish quite well. I think one of the tricks is not to overcook the veggies; they were tender but not mush. I've also been on a health food kick recently, and I replaced the regular penne pasta with whole grain pasta, which worked well. Everyone liked it so much that I didn't even have any leftover to bring to work with me for lunch the next day!


Citrus Shrimp with Penne Pasta

12 ounces peeled and deveined medium shrimp
4 cups (uncooked) penne or bow tie pasta
1 teaspoon finely shredded orange peel (set aside)
2 medium oranges
1/2 cup orange juice
1/2 cup water
1 tablespoon cornstarch
1 teaspoon instant chicken bouillon granules (I just used one of those little cubes)
1 teaspoon toasted sesame oil
1/4 teaspoon salt
1/8 teaspoon ground red pepper
1 red or green sweet pepper, cut into 3/4-inch squares (Since I double the recipe, I used one of each)
1 tablespoon cooking oil
1 1/2 cups fresh pea pods, ends trimmed and halved diagonally

Thaw shrimp, if frozen. Cook pasta according to package directions. Drain; keep warm.

Meanwhile, shred the peel from the oranges and remove remaining peels. Set oranges aside. In a small bowl, combine orange peel, orange juice, water, cornstarch, bouillon granules, sesame oil, salt, and ground red pepper; set aside.

In a large skillet cook sweet pepper in hot oil over medium-high heat for 1 to 2 minutes or until crisp-tender. Remove sweet pepper from skillet. Add shrimp to skillet; cook and stir about 2 minutes or until shrimp turn opaque. Remove shrimp from skillet.

Stir orange juice mixture; add to skillet. Cook and stir until thickened and bubbly. Return shrimp and sweet pepper to skillet; stir in pea pods. Cook and stir for 2 minutes more. Gently stir in orange sections. Gently toss shrimp mixture with pasta.

Nutritional Info: Makes 4 large servings! 384 calories, 7 grams total fat, 2 grams of fiber

Thursday, April 5, 2007

Blogarita's Kitchen Under New Management

Running a kitchen is hard work, so I've asked Violet to join me here at Blogarita's Kitchen.

Violet writes about food occasionally on her blog, The Lemonade Stand. At my request, I've asked for...and posted...some of her recipes here. I figured, why not cut out the middle man (me!) and have Violet post recipes whenever she finds one she'd like to share?

I've been treading water here in the Kitchen for a couple of weeks now. My goals have been not so much to try new things, but to use up some leftovers from our freezers and get meals on the table as quickly and easily as possible. I thought I had next week's menus planned, but found out earlier this week that we'll be having company for Easter, and ended up switching from grilled chicken to baked ham for Sunday's meal. That, in turn, caused the rest of my week to change, as I make meals to use the leftover ham. Simply put, I've been busy here, but not necessarily with interesting meals.

I hope to have some new recipes by the weekend, but meanwhile, I'm hoping that Violet will post her recipe for this scrumptious looking Citrus Shrimp.

Welcome Violet!!

Monday, April 2, 2007

Pasta With Smoked Salmon In Pesto Cream Sauce


Here's a recipe I came up with by combining and changing two other recipes. The great thing about smoked salmon is that a little of it adds a lot of flavor!

I really enjoyed this, but Spouse Guy said it isn't one of his favorites. Why? Because he doesn't like Parmesan or Romano cheeses. I cut the amount in the original recipes back considerably, but the prepared pesto I bought had a STRONG flavor of both cheeses, while most pesto sauces we've tried have been much milder. I will probably make it again, but I will try a different brand of pesto, or will make my own.


Pasta With Smoked Salmon In Pesto Cream Sauce

1 lb. any dry, chunky pasta, such as penne or bowtie (I used spiralini)
5 tablespoons butter
1 tablespoon olive oil
1 medium onion, chopped
1 cup sliced fresh mushrooms
2 cloves garlic, minced
2-1/2 tablespoons flour
2 cups milk
1/4 cup Parmesan cheese
1/3 cup prepared pesto sauce
1 cup frozen chopped broccoli, thawed and drained
1/2 cup chopped tomatoes (fresh or canned)
5 ounces smoked salmon, chopped
salt to taste

Cook pasta according to package directions.

While pasta is cooking, melt butter in a large skillet, adding 1 tablespoon olive oil to keep butter from burning. Add onion, mushrooms and garlic; saute until onions become translucent and mushrooms are tender.

Stir in flour. Cook, stirring constantly, for 1 to 2 minutes. Gradually whisk in milk. Cook over medium heat until sauce thickens. Stir in Parmesan cheese, pesto sauce, broccoli and tomatoes. Continue to cook and stir for 2 minutes. Stir in salmon and heat through, stirring often. Should sauce get too thick, add a little more milk. Add salt to sauce according to your own taste.

Drain pasta and serve with sauce.

Makes 4-6 generous servings.

Saturday, March 24, 2007

Strawberry Galette


There's some disagreement from website to website on just what a galette is. Right or wrong, I don't know what else to call this dessert, so I'm calling it a galette.

I had some strawberries in their juices in the freezer -- about a pint or so, I'd guess. Not sweet enough, these berries, so I added about 1/2 cup of sugar and brought them to a boil, then simmered them down to about 1-1/2 c.

I used a ready-made refrigerator pie crust (because it's just that kind of day) and placed it flat on my baking stone. I spooned about 3/4 cup of the cooked strawberry mixture into the center, then folded the dough up over the filling, leaving a 4- to 5-inch circle of filling exposed in the center and letting the dough pleat naturally.

I brushed the dough with just a little bit of water, then sprinkled the entire galette with a mixture of cinnamon and sugar. Then I baked the pastry in a pre-heated 375° for about 20 minutes.

I let it cool before cutting it into wedges.

I saved the remaining 3/4 cup of strawberry filling to use later, maybe as a topping for ice cream or spooned over some cake.

Wednesday, March 21, 2007

Cookie Update


This morning Sparky and I made the cookies I wrote about yesterday. We followed the recipe to the letter, taking them out of the oven when they were just barely done (they continued to brown a little on the pans). I even opted to use use the traditional oven -- something I haven't done since we got our convection/microwave.


Patience is key while waiting for them to cool on the baking sheets, but it's worth it. These cookies are really good! They are soft and chewy inside, with just a little crunch around the edges.


The trick now will be finding out how they fare overnight. Once Spouse Guy gets home, I'm going to have a hard time making sure there are any left to try tomorrow.


By the way, we made both large and small cookies. The smaller (1/8 c.) cookies were done in 14 minutes, and the larger ones (1/4 cup scoop) took 16 minutes. All told, the batch made 24 small and 9 large cookies.

Tuesday, March 20, 2007

Two Chocolate Chip Cookie Recipes

Bluepaintred emailed me to ask if I had a recipe for soft, chewy chocolate chip cookies. Well, yes...and no.

I have a tried and true recipe that makes cookies that stay soft, but they are more cake-like than chewy. It's the final recipe of this post, and can be made with either semi-sweet or milk chocolate chips.

I also have a recipe that I've never tried before that is supposed to make chewy-gooey cookies.

My understanding is that the secret to chewy cookies is as much in the method as in the ingredient list. Apparently, using melted butter instead of room temperature butter will help make the cookies chewy, as will the addition of a second egg yolk and the use of brown sugar. Don't over-bake the cookies; remove them from the oven when they are just starting to brown around the edges and the tops have just lost their wet appearance -- don't wait for them to look brown on top. Cooling the cookies on the pan, rather than moving them off the to a cooling rack, will help them stay chewy. Finally, when you store your cookies in a cookie jar or other airtight container, try putting a slice of bread in with them. It helps keep the cookies moist.

Here's the untried recipe. I don't think I will have time to make a batch today, but maybe Blue will, and will let us know how they turn out. I'll try to get to them myself within a few days.


Big, Fat Chewy Chocolate Chip Cookies

2 cups flour
1/2 teaspoon baking soda
3/4 teaspoon salt
3/4 cup unsalted butter, melted (if using salted butter, you can omit the 3/4 t. of salt)
1 cup packed brown sugar
1/2 cup white sugar
1 tablespoon vanilla extract
1 whole egg
1 egg yolk
1-1/2 cups semi-sweet chocolate chips

Heat the oven to 325° F (165° C). Grease cookie sheets or line with parchment paper.

Mix together the flour, baking soda and salt; set aside.

In a medium bowl, cream together the melted butter, brown sugar and white sugar until well blended. Beat in the vanilla, egg, and egg yolk until light and creamy. Mix in the dry ingredients until just blended. Stir in the chocolate chips by hand using a wooden spoon. Cover dough and chill for about 45 minutes.*

Drop cookie dough 1/4 cup at a time onto the prepared cookie sheets. Cookies should be about 3 inches apart.

Bake for 15 to 17 minutes in the preheated oven, or just until the edges are lightly toasted. Cool completely on baking sheets.

Makes about 1-1/2 dozen large cookies. For smaller cookies, use smaller amount of dough and reduce baking time by a minute or two.

*If your cookies are too flat, next time try chilling longer. If they aren't flat enough, next time omit the chilling step.

Thursday, March 15, 2007

Other People's Recipes

The past few days I've been able to try some recipes that other bloggers mentioned on their blogs and/or submitted here.

1. Pixie submitted her recipe for Meatloaf Muffins a while ago and we had those earlier this week. Just like she said, they were tasty and popped right out of the muffin pans easily.


2. Granny Geek mentioned this wonderful Chocolate Tres Leches cake on her blog recently. I had to try it, and I'm glad I did. I'm not a big fan of chocolate...a little goes a long way for me...but this cake was gone within a couple of days. The link to the recipe is in Granny's post.

3. Not long ago, Violet wrote about taking a Waldorf Salad to a shower she attended. (Sorry, Vi, I can't seem to find that post on your blog.) Anyway, it had been a long time since I'd had Waldorf Salad and I thought it sounded good. But I didn't have the typical celery and raisins that usually go in it. So I made up my own version using dried cranberries, instead. As an aside, I tried using mayonnaise. It was a brand new jar, but for some reason, it didn't taste fresh, but I didn't figure this out until after I had it in the salad. No worries...I just dumped all of the salad into a large colander, rinsed off all the mayo with cold water, let it drain a little and started over. This time I used Miracle Whip from an open jar in the fridge, and it turned out much better, without having to through the whole thing in the garbage.

Here's my version:


Blogarita's Cran-Apple Waldorf Salad

3 large apples, cored and chopped (leave peel on)
1 tablespoon lemon or lime juice (to keep apples from darkening)
1/3 cup chopped walnuts
1/3 cup dried cranberries
1/2 cup mayonnaise or Miracle Whip
pinch of ground allspice
pinch of celery seed

Toss apples with lemon or lime juice. Stir in walnuts and dried cranberries.

Add mayonnaise and stir until all pieces are coated well. Add allspice and celery seed and stir well.

Chill before serving.

Makes about 4 servings.

Saturday, March 10, 2007

Mediterranean Rice and Broiled Tilapia


When Artsy Girl was about 16, she worked in a Lebanese cafe that served this rice with every dinner. She was able to get the recipe from them and I reduced the amounts to a workable family size. It's a great side dish with just about any meat.

The tilapia recipe is more of a non-recipe, but I've included the directions below.


Mediterranean Rice

1/2 stick butter
1/4 cup vermicelli or broken angel hair pasta
1 cups converted (parboiled) rice
2 cups water
1 teaspoons chicken base (or 2 chicken bouillon cubes)
1 teaspoons seasoned salt
1/2 teaspoon garlic powder

Brown vermicelli in butter. Add rice and saute until aroma is nutty. Add remaining ingredients; stir. Bring to a boil. Reduce heat and simmer, stirring occasionally, until liquid is absorbed. Let sit 5 minutes before serving.

Makes 4 to 6 servings.


Broiled Tilapia

Italian-seasoned bread crumbs or corn flake crumbs
Dried thyme leaves
Garlic powder
Salt and pepper
Olive oil or melted butter
Tilapia fillets (1 per person)

Heat broiler.

Season the bread crumbs with thyme, garlic powder, salt and pepper to taste.

Spray a baking dish or shallow pan with non-stick pan spray. Brush one side of fish fillets with olive oil or melted butter and press buttered side into seasoned crumbs. Lay un-coated side down in baking dish or pan.

Place fish under broiler and broil until fish flakes easily and crumb coating is beginning to brown.